Blue Chip 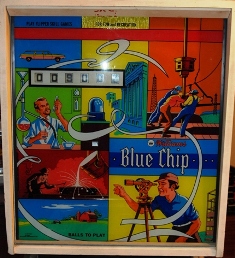 Repair Journal

|

|

|

|
|
I found this machine advertised on Craig's List on and contacted the seller. I purchased the machine the next day on June 9, 2010 for $250 although I did give the man a chance to 'not sell' once
I got it partially working for him. However he had purchased it a few years back and hadn't done anything with it and didn't think he wanted to spend the time on it. This machine is a Williams Blue
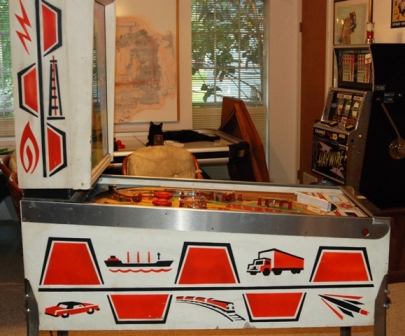
Chip made by Williams in 1976. There were approximately 1,800 of these machines made which by most accounts make them rare. It has an industrial / business theme which includes oil field workers
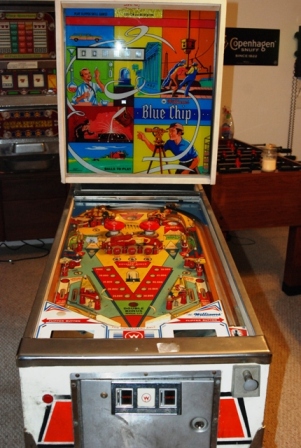
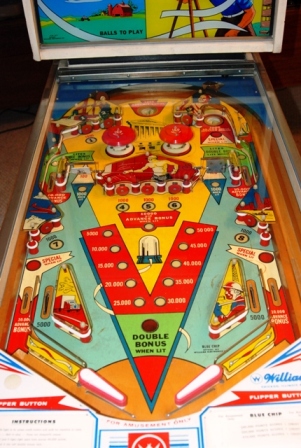
and a drilling rig or two. It is an Electro-Mechanical (EM) type which is to say there is are no computers or circuit boards in it. It is all ran with solinoids, relays, leaf switches, a single motor and LOTS of wires! This type of machine while a bit daunting initially to work on, they are very robust and as long as you can find the parts (or can fabricate one) you can keep it running. The photo to the right of the restored machine. |
|
|
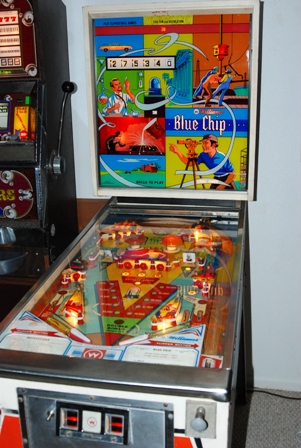
This journal will document repairs done on the machine. It was 'mostly' working when I picked it up but all the rubbers had completely disentigrated and some had even fallen onto the playfield
and stuck there. According to the seller it was set on 'free play'. Once we got the machine home, the first thing we did was determine if we could make it work with out the rubbers or ball on the
field just to see how much effort it was going to take to make it work. After some coaxing, I got the machine to reset into 'game play' mode and from there determined that all the scoring worked
but there were a few functional issues. Mostly the pop bumpers and kickers where not working. Lots of lights were not working which made if difficult to determine is the play process was working
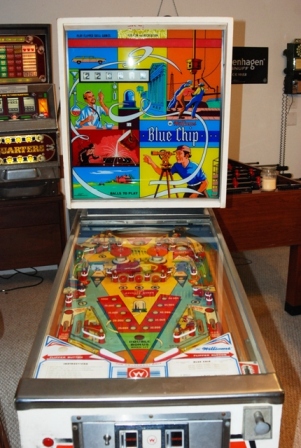
properly or not. It was VERY dirty. The photo to the left was taken right after we carried it into the game room. Opening up the game, I found it to be relatively clean inside with the normal accumulation of dust and dirt for it's age. The ball that came with it was completed rusted beyond use, but fortunately I had a spare from my Gold Wings purchase. |
|
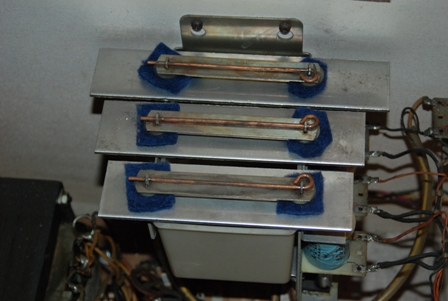
The chimes on this machine were making an horrendous racket and not at all like that should. Upon examination I found all the rubbers and plastics completely worn off the chime bar brackets. I
did a quick search on the net and the suggestions ranged from using old 5/16" rubbers to felt washers. I took a hybrid of these suggestions and came up with my on fix. In this you can see the chime box after I did my 'fix'. When we did the initial test the chimes either did not work or they sounded completely horrible. I pulled the chime bars off and cut up some thick felt I got at Michael's to fit around the bar tabs and then I put a short piece of heat shrink tubing then the chime bar and then another piece of felt and finally the hold down bar and keeper wire. This configuration allows the chime to vibrate as it should and got rid of all that bang/clanging noise. Ain't pretty, but it works well. |
|
|
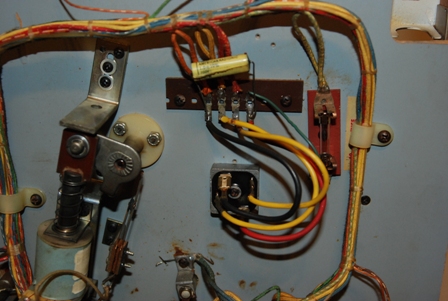
I tested the output on the transformer and it was putting out a steady 6v and 24v as designed. Since I couldn't see anything that really stuck out that would prevent the pop bumers from working
I consulted the manual and wiring diagram. Turns out that this machine uses DC solinoids for the bumpers and the kickers. I went back and tested the kickers and sure enough they weren't working
either. So, must be at the AC/DC conversion area. After some digging, Ninja showed me where the wave rectifier was! It is located at the end of the playfield closest to the shooter and there was
also a fuse mounted there. The fuse was wrapped in some type of foil covered paper. Hmm... could that be the problem? A trip to Radio Shack for a few fuses and I snapped a new one place. Ta-da!
Bumpers and kickers all working now! Woo hoo! A review of the machine found that I needed several parts: flippers, a spinner, lights, rubber kit and some cleaning solvent. I got online with Marco Specialties and they had everything I needed and was very helpful in insuring I got the right parts. I had them overnight the parts and cleaner! |
|
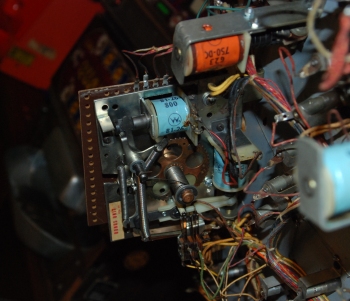
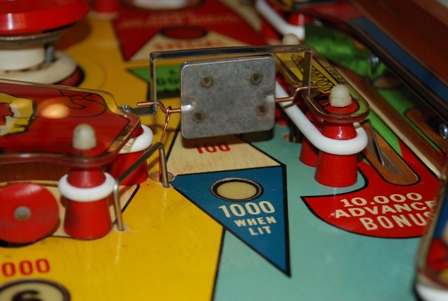
In this photos you can see the solinoid used for the bonus unit. I had found a solinoid mounting bracket lying in the bottom of the cabinet and when I pulled the playfield completely out to work
on the far end to repair a few lights and I discovered it was for the bonus unit. I glad I found this backet and it's location prior to playing the machine to much as I'm sure the damage would have
been excessive. I did notice that there are fuses all over the place on this game! I found the first four next to the power transformer and they were all good. |
|
|
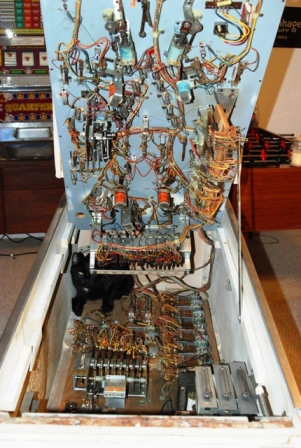
After the repair of the bulbs and solinoid brackets we returned the playfield back into the machine. Here you can see it propped up and Ninja was validating that we had reattached all the plugs
and such properly. |
|
While we were waiting on the parts, Micah, Hannah and I took off the playfield plastic and began the process of cleaning everything. I made the mistake of trying to clean the metal face place at
the front of the playfield with glass cleaner. Come to find out, the 'ink' on this plate is not sealed and it was trying to come off. Luckily I suspected it might do so and I hadn't done to much
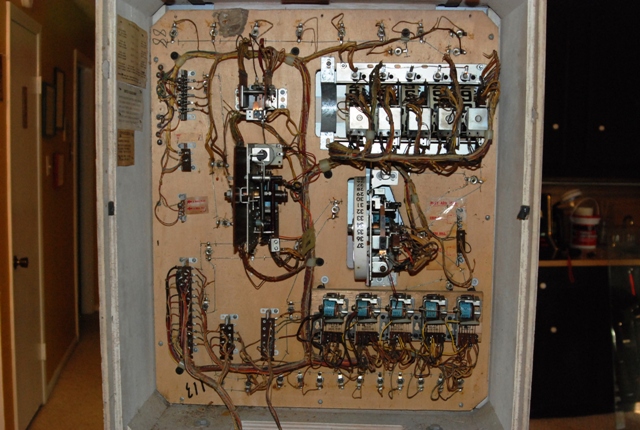
before I realized what was happening. Soap and water only on this part of the machine! I also started to examine the back board components and disovered how the previous owner modified the credit system, he simply cut all the wires to the credit system solinoid and then rotated the credit wheel so no credit was removed and no credit granted. The credit wheel is the big skinny one in the center. I am hoping to remedy this in the future but will need to acquire a coin-mech first and then make sure all the wires are hooked back up like they should be. For now I'm going to leave it on 'free play'. |
|
|
After recieving the parts package from Marco Specialties we dove into the replacement process. The spinner wire was a bit larger than the original so Micah and I put the bracket on the drill press
and enlarged the hole so it would fit. Putting it back on the machine, Micah then fabricated the connection wire that is used by the spinner to pull on the leaf switch. While he was doing that I
replaced the flippers with the new ones and adjusted them. Meanwhile Hannah was cleaning the playfield glass which was EXTREMELY dirty. With the 'under work' done for the most part, we then tackled putting all the new rubbers onto the machine. Micah pulled all the lights and cleaned them and then re-installed the ones that were still good. After all the lights were done and the rubbers installed, we then put all the cleaned plastic pieces back onto the playfield. As you can see in these next two photos, the results were fantastic! |
|
Hannah cleaned up the back glass... again JUST THE FRONT as the ink would certainly come off if we tried to clean it. I've cleaned some of the score wheel locations but not all when this photo
was taken. You don't want to turn the score wheel manually. It is best to clean what you see by holding the wheels with your hand, then change the score and clean the sections now showing. Putting the glass back on it was time to play test it! I fired up the machine and Hannah pressed the demand button and the machine reset... but... the ball didn't show up at the shooter as it had done previously. I tried to see if the ball was hung up under the metal face plate and as I was doing so, Micah realized he had it in his pocket! We put the ball in and began to test it for real this time and it seemed to working about 90%! |
|
|
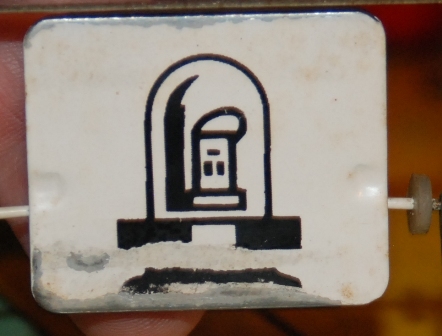
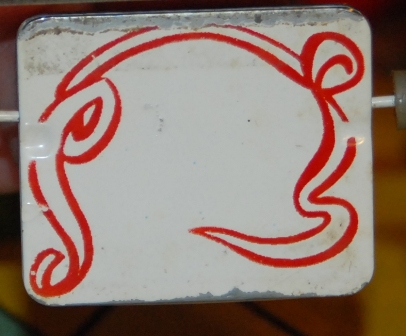
In these photos are the front and back of the original spinner. Since I was missing a spinner, I searched the net and found some suggestions on replacement decals. Here's what I've decided to do. First
I took the photos. Then I brought them into MS Paint and worked with them there to create a image of each side that I could print. I then printed them on standard paper and resized it until they were the
right size for spinner. I put a sheet of 2" by 4" shipping labels into my ink jet and printed the images on the lables. Since I didn't want the ink to be 'knocked off' I got some heavy duty CLEAR packing
tap and put it over the labels with the images printed on them. Using an exacto knife I cut out the now 'sealed' image labels and stuck them to the spinner. Ok, so I haven't done it yet, but, this is what I am planning to do! I'll put up photos of the completed spinner once I get it all done! |
|
|
|
To my pleasant surprise, the method that spoke of previously has worked great for the spinner decal. For the labels I used Avery #48863 2x4 inch white shipping labels and for the protectant I used a
Scotch clear heavy duty shipping tape that I acquired at Walmart. In order to make the decal print I pulled each of the above photos into MS Paint, cropped it down to just the images I needed and then
began the painstaking task of removing everything thing I didn't want. I also went through and 'recolored' and 'reblacked' the images as the original files had all sorts of shades of colors and grey in
them. This process probably took me a good 3 hours. But, the results look awesome! I am going to wait and see how the labels hold up to game play and if it does well I will do the other side. I had to mess with the size of images to get right size for the printer. To make another set I will have to resize/reprint then tape and cut them down to the right size. Oh, one departure from the above process, I didn't use my exacto knife, I simply cut the decals down the right size using a good pair of sissors as I would able to hold the label up to the spinner to get the size right and I also rounded out the corners so it fit the spinner better. To the left are the two files I used to make the decals. Not sure if they will be the right size on your printer but they fit great on my HP wireless ink jet. |
| This photo shows the side art. The opposite side is the same. This photo was taken just after it was brought in so it still shows some dust and dirt. I've done some cleaning thus far but not enough to warrent a new photo. |
|
|
Once we had the machine working 90%, I then turned to the little things to bring it back to factory level working. Listing the issues, they were; Match process, credit wheel, coin acceptance, Right
Eject not giving 50k when lit and weak flippers. The match process is disabled when the machine is set to Add-A-mode and once I switched it over to Credit Mode the match selection wheel (on the back
board) tried to work. I found it to be loaded with crud and with a little cleaning and some light oil, it now works as it should. The Credit Wheel was disabled so Micah and I reconnected the wired and
resolidered the wires. With credits at and and above on the wheel the machine gave a game as it should but not for 1 credit. Examination found that the Zero Position switch needed adjustment which
solved the problem. The next thing to fix was the coin acceptance. The machine can be set to take nickels, dimes or quarters and it can give multiple credits per coin or a 1 credit per coin or 1 credit for the first coin and 2 credits for the second coin. I put all the setting to 1 credit per quarter. The switches and trip wires needed to be adjusted and new lamps put in the coin slot window and with a bit of tweaking on the credit wheel switch adjustments it can now add credits. The machine did not have the coin mechanisms in it so I searched on eBay and found two mechs for $25 shipped so I purchased them and once installed, it now takes quarters. Of course the next thing was replace the broken locks! The photo the left is the finished machine all cleaned up and playing! |
|
The issue to tackle was a bit more confusing. The right eject saucer (hole) is supposed to give 5k when unlit, 50k when the hole is illuminated and 50k plus a credit (or ball depending upon game
mode) however the 5k worked and the special worked but when it tried to give 50k points, the motor would run but no points were accumulated. This problem took me days to figure out. I tried various
things but nothing seemed to do the trick. Since it gives 5k or 50k through rotation of the motor then I thought there must be a flip/flop switch to make it turn the 10k wheel instead of the 5k wheel.
My suspiction was close. After hours of looking, I discovered that there was a 10k switch on the Special Relay switch bank that was installed upside down. I pulled it out, flipped it and now it works
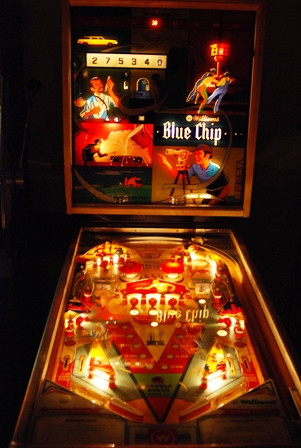
as it should! The last issue was the normal weak flippers and that problem was solved by adjustment to the End Of Stroke (EOS) switch. With the machine now functioning as it did when it left the factory, we then REALLY cleaned the machine with Novus and that included the score reels, playfield and back glass. The photo to the right is the finished machine all lit up. |
|