X1 Pocket Bike
Police Special
|
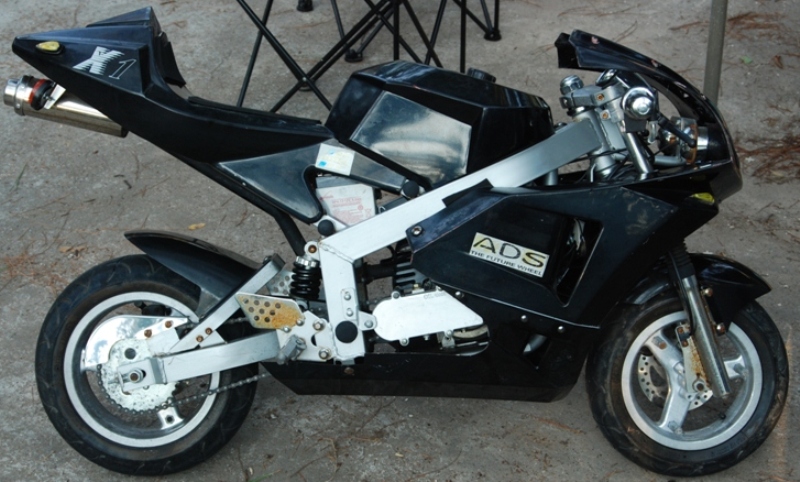
Purchased from a family with the typical story, bought it for their kids only to learn it goes faster than their riding skill level. So it sat for about 2 years until they sold it me. There were hardly any hours on the bike and the body parts were in decent condition so I paid the cash and brought it home. |
|

|
My first goal was to make it run. I pulled off the tank cover and discovered that oil/gas mix had been left in the tank and now all the gas had evaporated leaving a thick sticky sludge. This crud was in the tank, in the filter, in gas lines and totally caked in the carb. So, I spent a few hours cleaning the tank and tearing down the carb completely and cleaning it. I replaced the fuel lines and the in tank filter with new. I pulled the spark plug and cleaned it on my bench grinders wire wheel. Since they had 'lost the key' I tore out the locking part of the key set so that I could use a screw driver to turn it on. I then used my car batter charger to charge the 12v battery. The old battery wouldn't crank over the motor, so I had to pull start it. A little starting fluid certainly helped and it started right up and off I went! So, with the bike running great, I turned my attention to the appearance of the bike! |
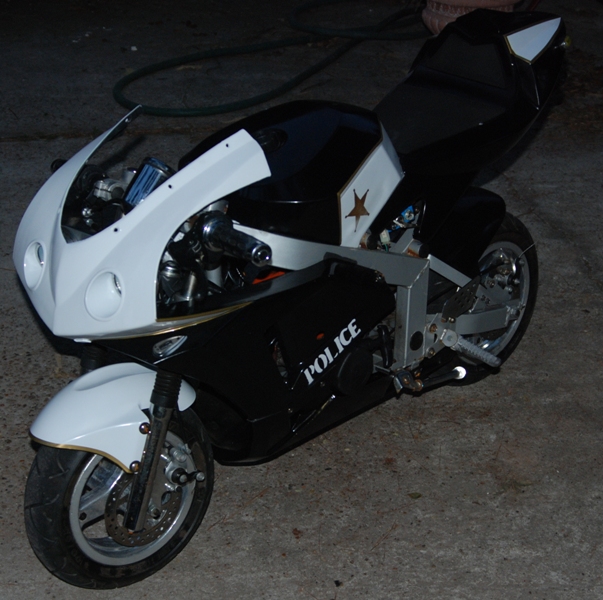
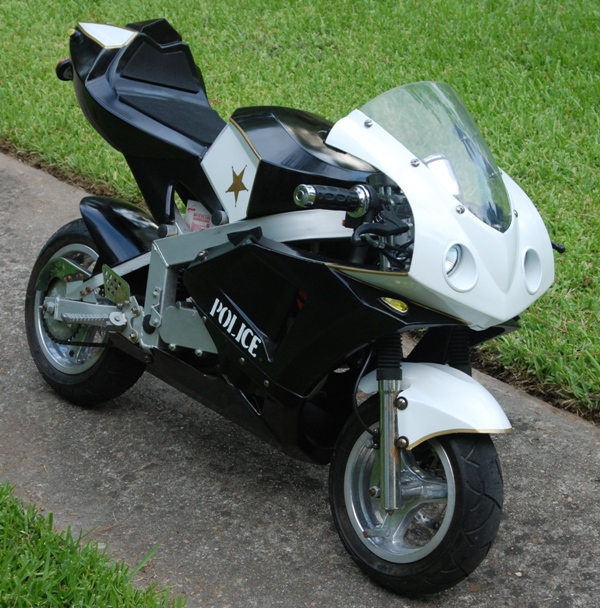
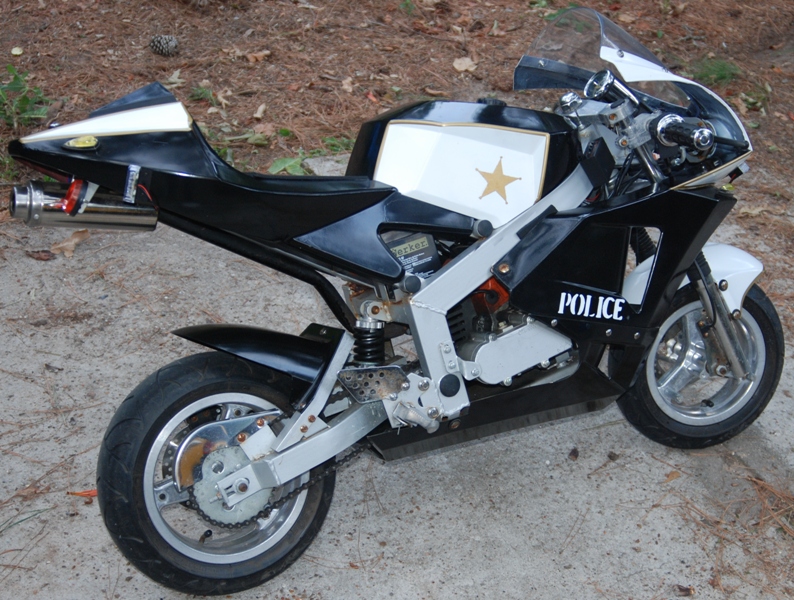
| I decided there were too many fancy racing paint jobs and I wanted something unique. After seeing a modern street bike being used as a police bike, I decided that would make a great paint scheme. So, I pulled off all the body parts and sanded them all down in preperation for paint. |
|
|
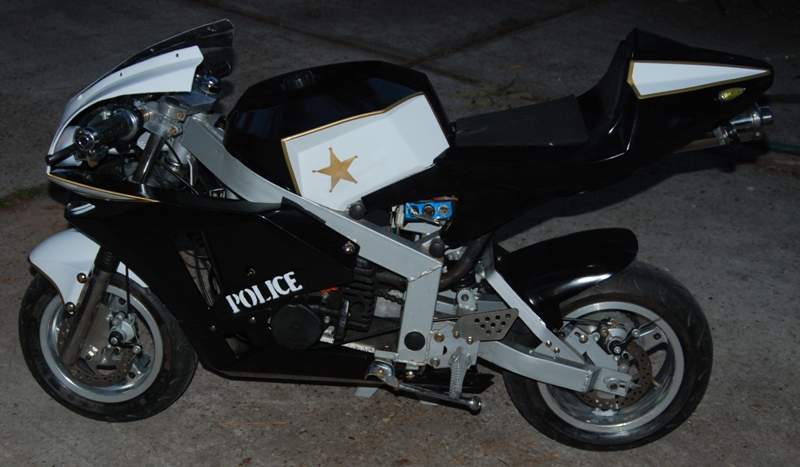
I painted each component with black first and allowed that to dry for 12 hours. Then I taped off what I didn't want to be white and sprayed on the white. After the white dried, I used some gold pinstripe tape to trim out the bike. My wife created the stenils for the "POLICE" and the star. I painted the word and she used her skills to paint the star. I have on order a new windscreen and the lights and hope to have them soon. I am considering strobes and a siren if I can find a cheap enough set that will look good and run off the existing 12v system. I will update this page as I get more done. |
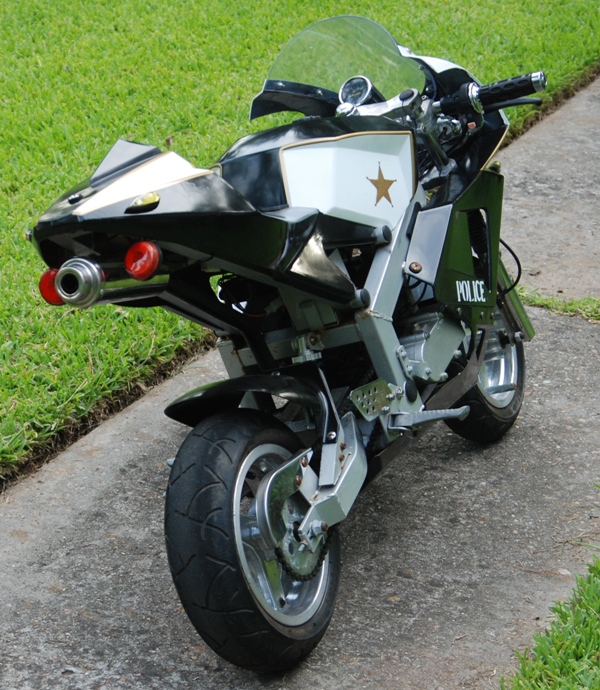
| Today I got the parts I ordered front a gentleman that I found on PocketBikePlanet.com. They were well packaged and therefore arrived in great condition! Thanks BigHomeDog! So I turned on the shop ceiling fan so I could stand the heat and installed the parts. All the parts when on easily and the new lights worked as expected. |
|
|
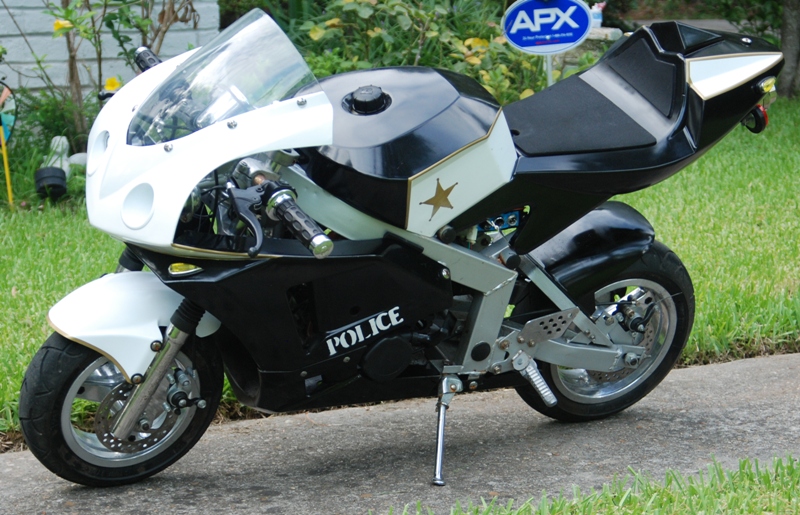
While I had the body kit off, I figured I'd do some adjusting on the carb. It seems that it doesn't want to idle well and I'm not sure if it's the carb or that the clutch isn't disengaging as it should. So I pulled the adjustment screw and sprayed the jet with my carb cleaner. I installed the adjustment screw all the way in and the backed it out 2 1/2 turns. Originally it was at 2 1/4 turns. I noticed when I put the body kit back on that there is a round hole on the left side so adjustments can be made with out taking the body kit off. |
| Once I had it all back together I had to take it for test run around the neighborhood. While it seemed to idle a bit better, I seemed to have lost some top end. I had tighten the idle setting a bit as well which may be the reason that it idles better and not the fact that I have the fuel/air mix right. I'm going to have to tinker with these adjustments until I find the right setting. When I get it figured out, I'll post my findings here. |
|
|
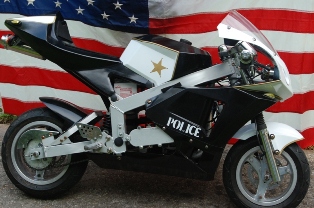
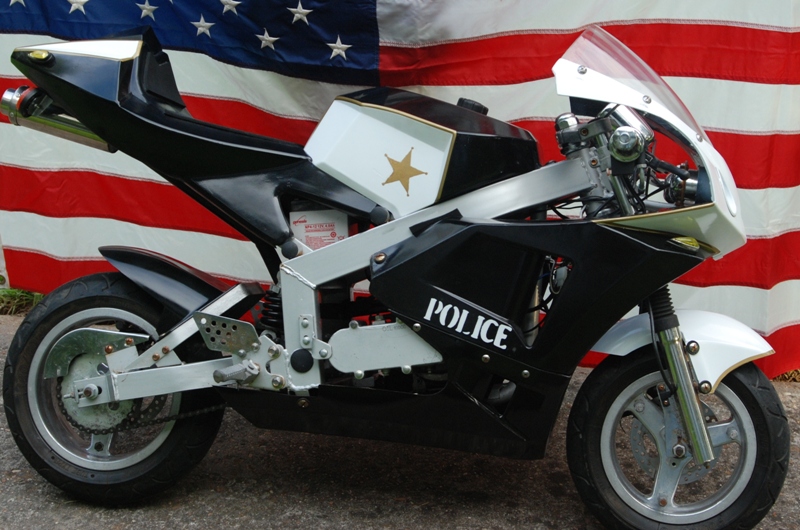
While I was putting my camera up from taking the first three shots with the new parts on it, it was suggested that I use a flag as a back drop. Cool idea! So, here's the results. It's an OK shot, but I need to get a better angle on it to do the bike and the flag justice. Next additions: correct sized battery, battery charger, turn signal repair and STROBES AND A SIREN! |
|
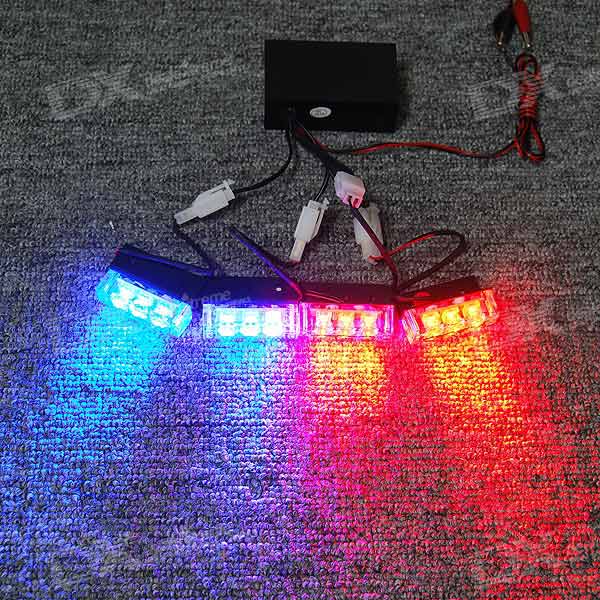
In my quest for 'strobes' to put on the bike, I found the item pictured to the right. It has been ordered and is now in route from Hong Kong. You can order one too and here's the link! https://www.dealextreme.com/details.dx/sku.15729 It should arrive in 7 to 10 days and I'm sure I'll install it the day I receive it! |
|
|
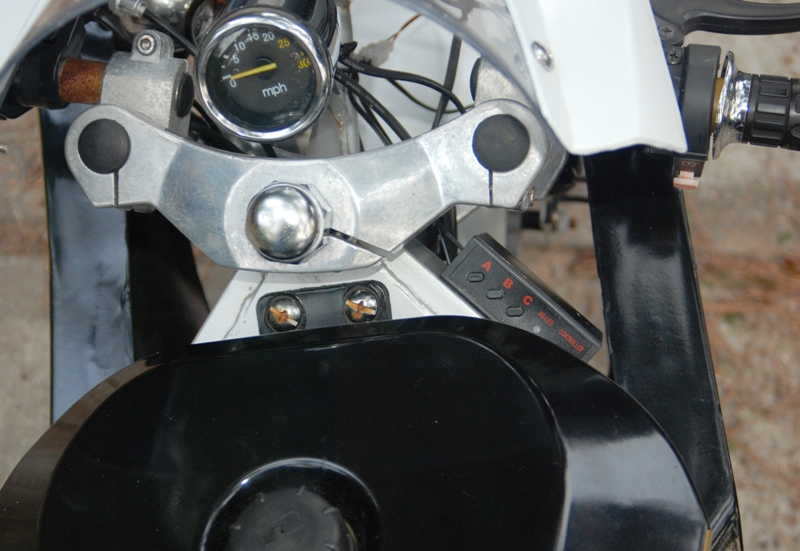
Well, the strobe system came in and as stated earlier, I installed it the day it arrived! The kit came with 4 light segments with metal brackets for mounting and the screws in which to install them. The controller, pictured here has no mounting bracket so I used heavy double sided tape to affix it to the bike's frame. This location allows for easy access, out of the way from the steering system and it is within easy reach. |
| In this photo you can where I mounted the strobes on the front and rear of the bike. This location allowed me to screw the mounting brackets to the body panels. The system has connections at each light segment point and at the controller. So if I need to remove the body panels I can simply unplug the light kit. I used a permenant marker to label each connection point to help in reconnection if it becomes necessary. This photo was taken with the strobes turned off. |
|
|
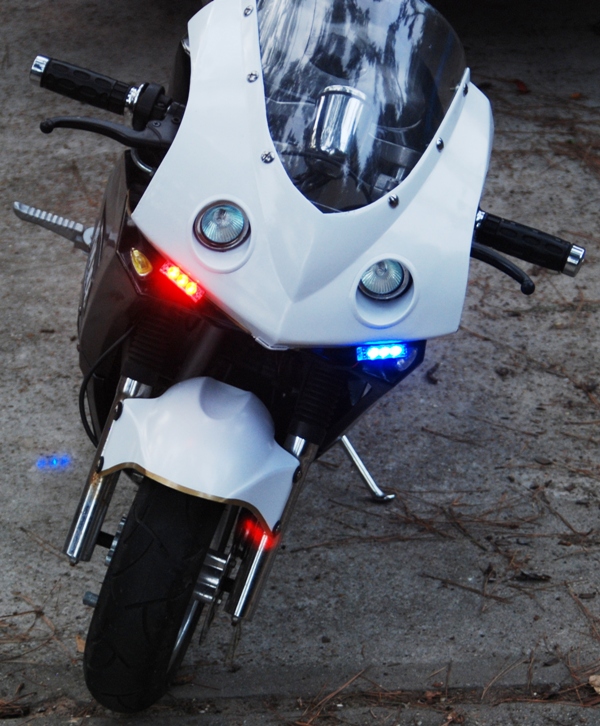
This photo shows the front of the bike with both strobes lit. The strobe kit comes with 3 settings; A, B and C. All setting will flash two segements together. Switch A will flash one set 3 times quick then the other set 3 times quick. Setting B will turn on set on and off and then the other set on and off. Setting C will turn on all four and then all four off. |
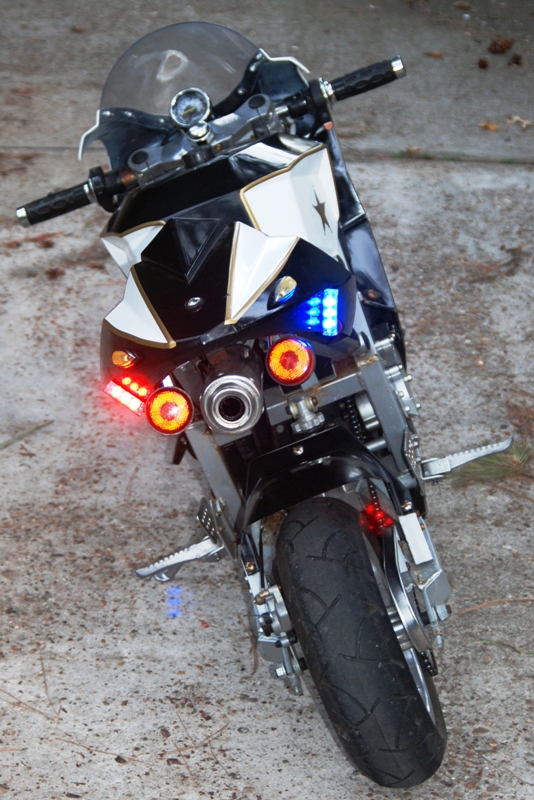
| This photos shows the rear of the bike with both strobes lit. I used the C setting to take the photos in order to catch all the lights lit at once. |
|
|
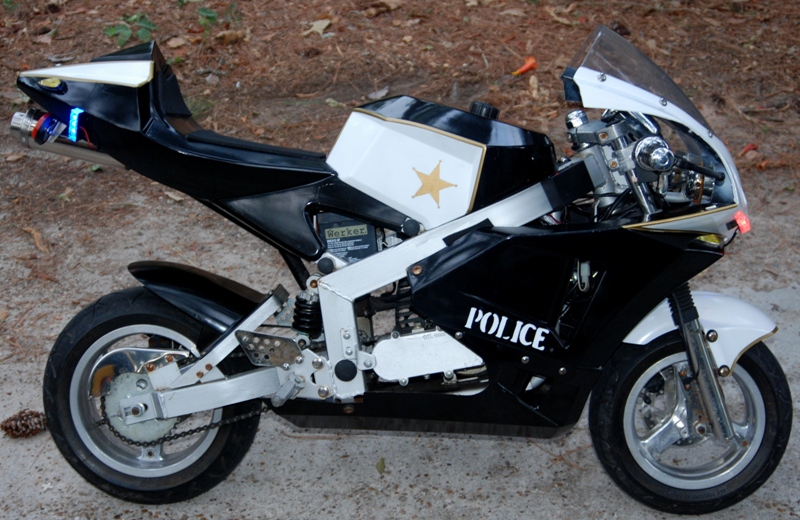
Here the strobes are lit showing the mounting on the side of the bike. These strobes do a great job and can be seen from all directions even in the day light. This LED light kit has exceeded my expectations and really added a finishing touch to the bike! |
| This video link shows me riding the bike down our short street with the strobes and head lights on. While I wasn't able to get to full speed on our short road, the bike will run about 30mph with my 175lb butt on it! |
|
|
|
Here's another YouTube video of me riding the bike from the opposite direction. In this one you can see my left foot is off the peg, this is due to the fact I had almost laid it over and wasn't able to get the peg back down! |
|
With the bike 99% complete I put it on Craig's List here in Houston for sale. A very mature young 14yo man replied quickly, asked a few questions and taked price. He hung up with me so he could consulted with his dad and then called back to 'seal the deal'. I delivered the bike and he took it for a test ride. He took out what appeared to be a collection of cash that had been accumulated over time and paid the agreed price. He loaded up the bike and took it home! |
|
