|
When the house was purchased, there was this really cool glass room on the back and it came with great expectations. As time progressed, it was realized that the glass roof on a glass room in South East
Texas had all the charateristics of a human sized Microwave! Ideas were tossed around about what to do with it. It made a great green house but that didn't realy do much for me plus several of the glass
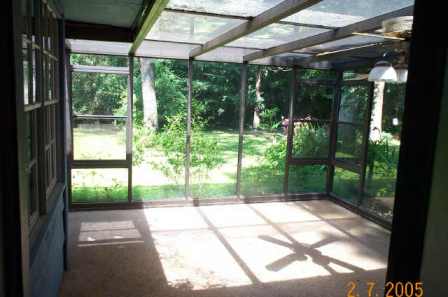
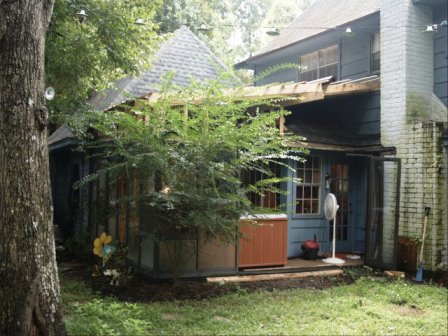
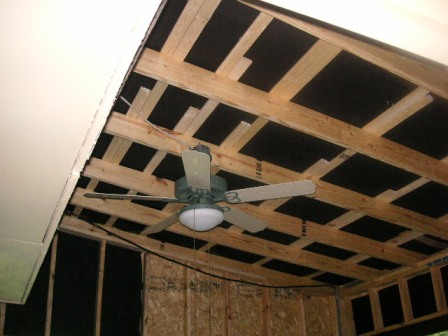
roof panels were cracked and it leaked like a sieve. The idea then came about to pull off the roof and put in a Hot Tub. So the work began This photo shows the inside of the right shows the inside of the
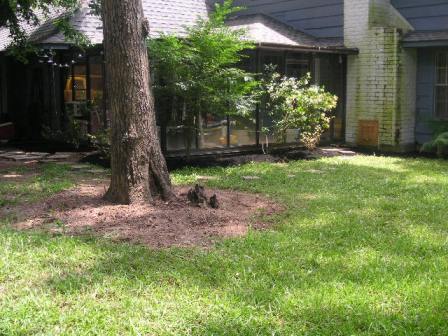
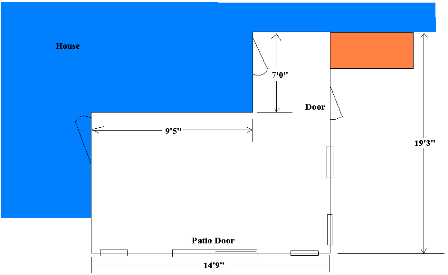
room before any major work was done. The two photos below show the view of the patio room from the yard the floor plan showing the size of the room.
|
|
|
|
|
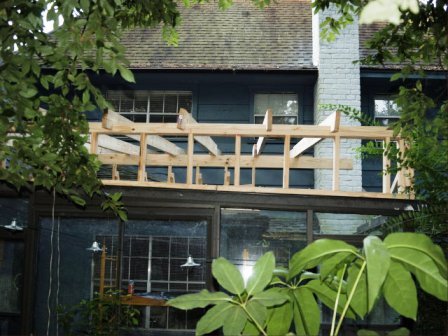
First thing I did was to remove the roof. I decided to keep all the aluminum beams and brackets and such and stashed them behind the garage. These later became the materials we used to build the
Trebuchet although I'm not sure what I'm gonna do with all the glass. After the roof was removed, I placed a supporting beam across the rear of the house just below
the second story windows. I wanted the roof line to end up just above current roof line and still give plenty of head room to be able to step into the hot tub and clear the planned ceiling fan. I estimated
the height of the down side roof line and started building the supporting wall from that point. There was a slope to the existing wall so I had to compenstate for that in order to keep the roof line level.
|
|
|
|
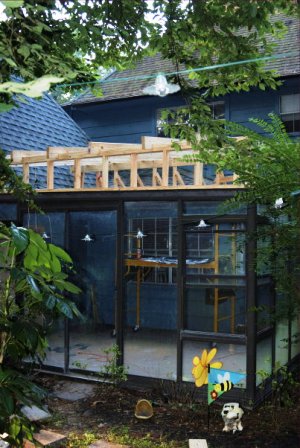
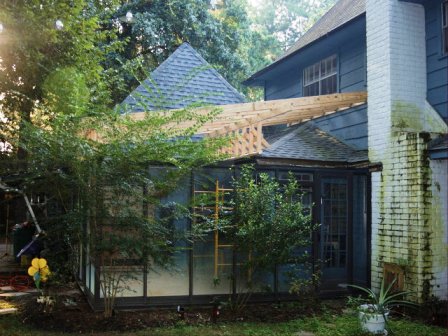
I put a stong beam across the room at the edge of the back wall which was not quite half the distance but close enough to be sturdy enough to support the large span over the hot tub area. As you can see
in the photos, I build all the rafters and front wall support but left the side wall incompleted. The hot tub/jacuzzi that was ordered is an 8-seater and I needed to have room to put it in which meant that
I had to take down a large section of the side wall.
|
|
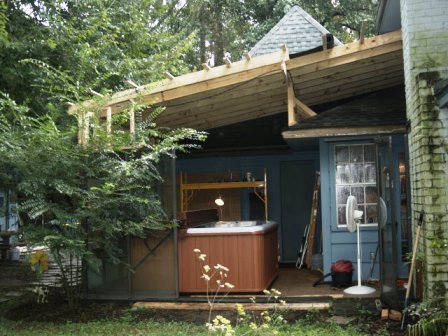
In order to move the hot tub in I first up rooted and saved all the plants along the side wall and then removed the door section, the window section and two regular wall sections and set the materials to
the side. At this point I had also installed the tar paper moisture barrier and the metal roofing panels over a majority of the roof. My goal was to complete the roof and dry it in as quickly as possible
once the hot tub was in place.
|
|
I had an electrician modify my electrical panel for the new ground fault protected breaker that was required as my old breaker box was already full. It took him about 3 hours and lost of rearranging in
order to get the new breaker in. While he was doing so I ran the heavy gauge wire from the breaker box to the spa room and then across the spa room and down the corner where the two glass walls come
together. At the corner I put the wire into a section of conduit for neatness and appearance sake.
|
|
|
With the spa in place, the room was beginning to take shape and I was ready to put the glass wall back and complete the roof. Did I mention that I was doing this in the record heat wave in August of
2007? It was incredibly hot, but I was afraid that the weather would turn on me so I forged ahead. I also replaced the plants and fortunately only of them died.. which was a gardenia bush and I can't
say I was disappointed with that. Those flowers stink!
|
|
I then proceeded to complete the side wall above the glass which allowed me to support that end of the main support beam that was still hanging free. I covered all external walls with tar paper and
then over that I placed pre-painted external siding. Completion of the roof was then done and I did the best I could to seal the various roof joints to the side of the house, the chimney and the sloping
roof over the utility room.
|
|
|
As soon as I had the wall installed and the roof completed, I put in the window AC unit to make it bearable to complete the interior work. With the framing and roofing done, I then focused getting
it ready for insulation. My goal for the spa room is for it to be usable year round and to do so, that would require cooling in the summer. Therefore, have a good water seal and insulation was a
definite requirement.
|
|
However, before I could insulate, I needed to complete the electrical work. I installed a ceiling fan with a light, an exhaust fan that is located on the ceiling near the chimney, electrical outlet
for the planned stereo and flat screen, a cable TV jack and the wall plates for the speakers. Along with the stereo I placed a Roku Soundbride device which allows for listening to Internet Radio
broadcast through a regular stereo system.
|
|
|
The room was really taking shape and the use of the AC system certainly helped! To insulate, I used R-19 through out which would be considered a bit of over kill but due to the fact the room has
a metal roof I figured the extra cost was well worth it. Since it comes in large rolls, I used the pieces I cut off to insulate the side walls. With that all done the next step was sheet rock.
|
|
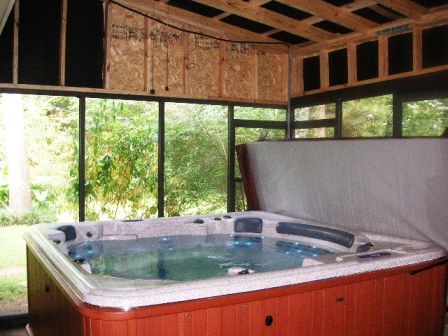
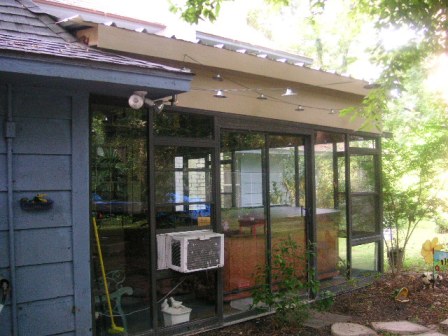
The sheetrock process was a nightmare and unfortunately I haven't completed the taping and floating todate. When I first built the room I really had no idea how to tape and float but when I built
the Mancave I learned. So hopefull I'll get to this soon. This photo shows the completed sparoom from driveway. You can see the window AC unit on the lower left. That unit proved to be too small
to keep the room cool when the tub was in use. When I built the ManCave, that unit went in there and I purchased a larger unit for this room.
|
|
|
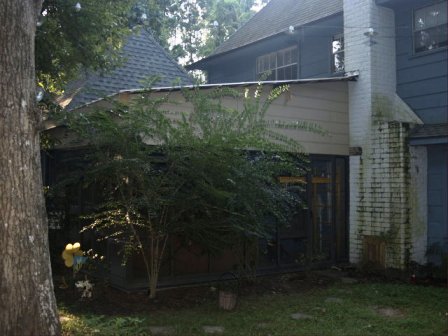
This side shot from the yard shows the room completed. At the time the photo was taken I had not installed the exhaust fan outlet which eventually went through the wall next to the Chimney and
just under the roof line. When Ike came through and passed directly over the top of the house, this roof with stood the wind and rains but the chimney was shifted slightly. Since that time the
chimney has be repaired and cleaned.
|
|
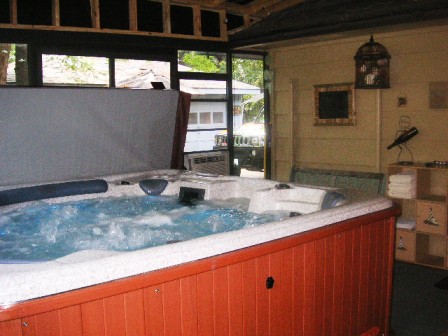
Here is a photo of the spa in the room with cover closed. In order to be able to 'flip closed' the cover with out interfering with the ceiling fan, the cover was custom made with the front
section split in half. This way, a small section if lifted up and back followed by the second half until it lays flat on the larger section and the whole thing is then fully opened. One of the
nice benefits of this design is that I can check and adjust the chemicals without having to open the whole spa.
|

|

|
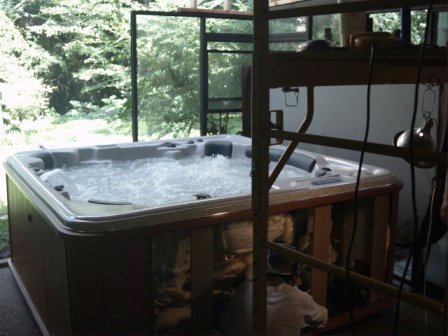
Here is a photo of the spa itself. It has 8 seats and each seat except for the two person wave seat has it's own configuration of jets. Every jet can be individually adjusted and the jets
are sectionalized so that air can be injected in specific seats for a more vigorous massage. The wave bench seat has the jets working in sequence with the top row first, then the next lowest and
so on to the bottom and it then repeats. This gives you a nice massage down the back. In the center of the floor is a 'volcano jet' for great foot and calve massage. It also has hot tub bubbles
that can be controled seperately from the jacuzzi jets. As a bonus there are multi colored LED lights, aromatic injection and Ozone generation.
|