|
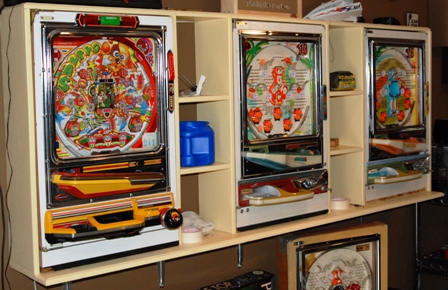
I had previously constructed a wall unit to hold 3 pachinko machines and as my collection of machines have grown so has the need for another wall unit. This photo is of the first version and the from
which I patterned the one detailed here. In this project I will outline how I constructed the wall unit. I did so with very little actual use of a measuring tape and instead opted to use one of the
machines to 'fit' the construction.
|

|
|
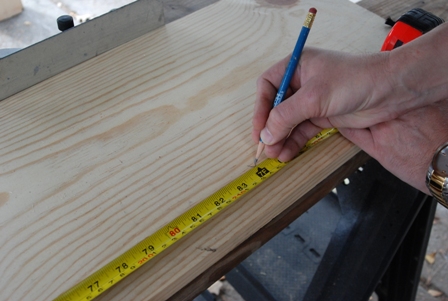
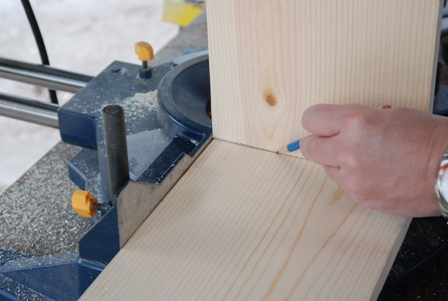
The wall unit is made from shelving pine and takes 1 1x12 by 8ft and 3 1x8 by 8ft boards. A 1x10 could be used instead of a 1x12 to save in cost but reduces the 'player shelf' size. The first
measure and cut is at 7ft. Cut the 1x12 first and this will be the bottom of the unit and the player shelf.
|
|
Set the bottom board on top of one of the 1x8s and make one end flush. Ensure one side of the boards are also flush for the full length.
|
|
|
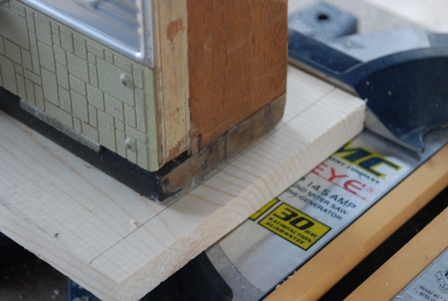
With the edges flush, mark the end of the 7ft board on your 8ft board. This will insure the two boards are of the same length. I find that this technique generally ensures I have symetry where I
need it.
|
|
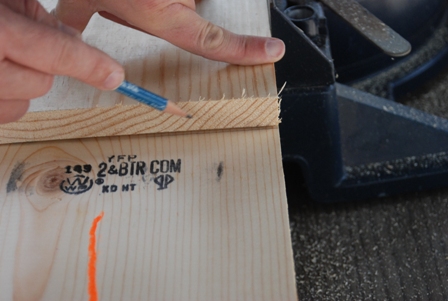
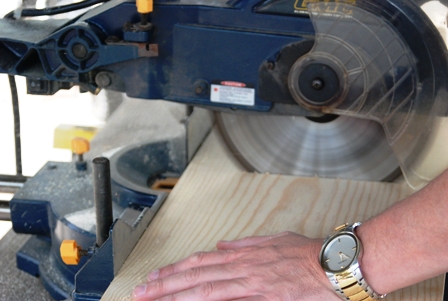
Now you can cut the board. Make sure you cut on the RIGHT side of the line which is the OUTSIDE of the area you want to keep. Cut correctly, you will have minimum loss, cut wrong and you have
another trip to the lumber store! The use of a 'pattern' to make multiple pieces that are identical is simplistic and yet very important. This really becomes evident in cutting the shelves and sides.
|
|
|
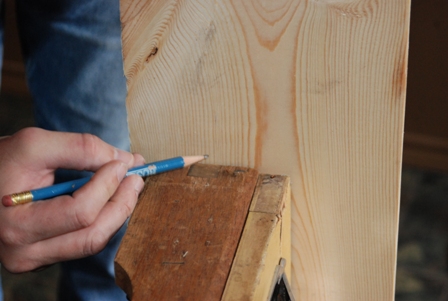
Set the bottom aside and work with the top. Determine the bottom (mostly hidden) side of the board and turn it up on your work area. Set one of the small sections you just cut off flush with
the end of the board and mark along the full board. This sets the outside of the first machine area. Repeat for the other end which sets the outside of the third machine area.
|
|
Now set a machine (or what ever your trying to fit) one the top and aligned with one of the marks you just made.
|
|

|
Then mark the far end of the machine with a short mark to designate the end of the machine area. Repeat this process for the other end.
|
|
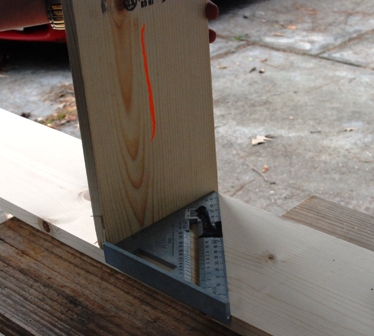
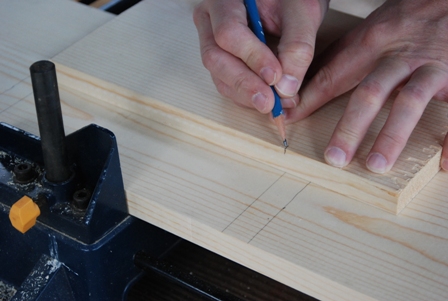
USing a speed square, place of the short piece we used before at one of the marks you just made with board on the INSIDE of the mark.
When you have it squared, make a full mark on both sides of the board. This is where the inside of the outter machine section will be.
Repeat for the other side.
|
|
|
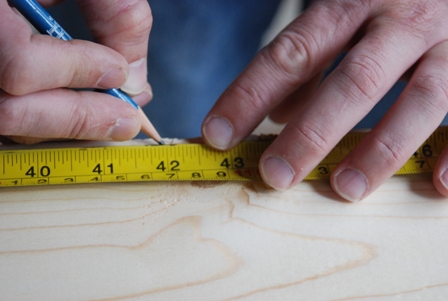
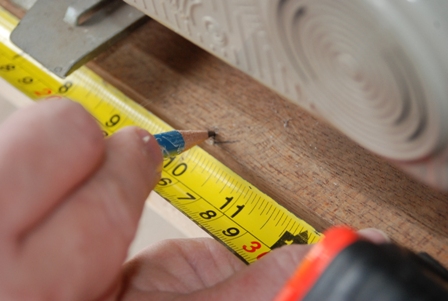
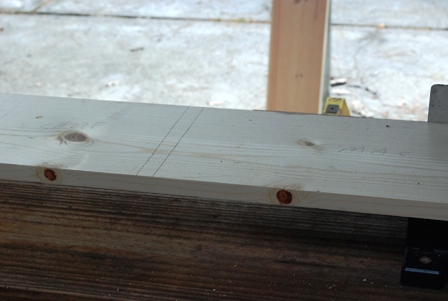
Using your tape, measure off 42" (3'6") and place a mark to designate the very center of the unit. My Dad taught me to used two marks
and make a /\. This is more exact that a single line that can waiver.
|
|
Now get the center a machine (or what ever your trying to fit) and make the same type of mark on it.
|
|
|
Align the mark on the machine with the mark on the board. Then make a mark at each side of the machine. These two marks designate the
outside edges of the center machine. Move the machine and use the same technique as before with the short piece to mark where the side
boards will be placed. Make sure you put the piece on the OUTSIDE of the mark you made.
|
|
With this complete and starting at one end you should have a skinny section (1st side) a large section (1st machine), a skinny section
(2nd side), a medium section (1st shelf area), a skinny section (3rd side), a large section (middle machine), a skinny section (4th side),
a medium section (2nd shelf area), a skinny section (5th side), a large section (3rd machine) and a final skinny section (6th side).
|
|
|
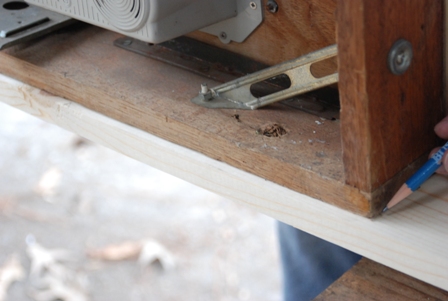
To cut the sides, stand one of the remaining boards next to the machine and place a mark just above the top the machine. This set's the
height of the side. Cut this board to lenght and validate it is correct. Once sure, write the word PAT (for pattern) on this board. Using
the 'flush and cut' technique described above cut all 6 sides You will find on 8ft board will make 3 sides with very little left over. Make
sure you use PAT each time to mark a board to keep the lengths consistant.
|
|
Now to make the shelves. Place the remaining 1x8 on the top piece and alight one end with the inner side mark of the shelf area. Then
mark the other side to set the shelf width. If you have done this correctly, you will find that the width of this shelf area is the same as
the width of the other shelf area! Thus.. you can make all the shelves the same width! Mark the first shelf cut as PAT and make the other 3.
|
|
|
Use of the side pieces and position two shelves where you want them. Distance between the shelves doesn't really matter. I made mine
consistant which is about 10 1/4" apart. Once you have the first side marked, put it next to a corresponding side and put adjacent marks.
This is were a large framing square comes in handy as you can mark multiple sides at the same time.
|
|
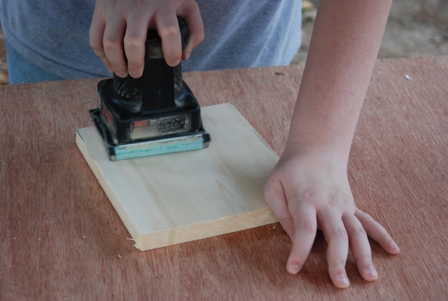
Before you start putting it all together, sand it down. As you do so, determine the 'pretty side'. Everyboard will have a one side
that is exposed and one side that is not. If you are using screws like I did, pre-drill the holes that go though the boards (not the ends)
and make the counter sink pits.
|
|
|
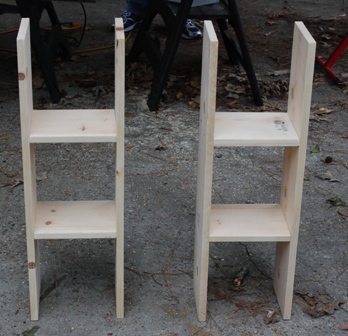
Building the sides takes just a few minutes. Make sure you have the 'pretty side' of the sides towards the shelves and the 'pretty side'
of the shelves facing upwards. Also make sure that you align the marks on the sides so that the ends are flush as the shelf distances could
be off by a fraction. Put both shelf units together.
|
|
Set the top and bottom pieces next to each other and mark the bottom with the locations of the side pieces. Make sure you mark the BACK
of the bottom piece! This would also be a good time to router the front edge of the player shelf and drill the holes and counter sink pits.
With this done, you can then affix the top to the shelf units by alligning them to the marks.
|
|
|
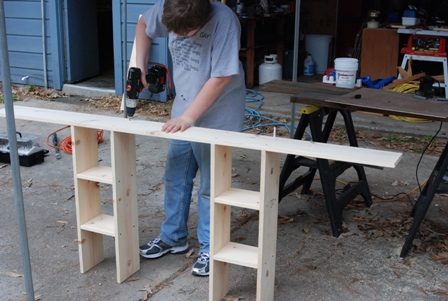
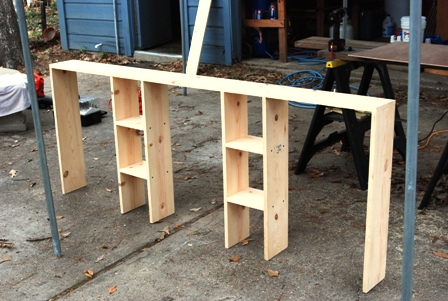
Then put the sides on the top. This almost completes the build.
|
|
Flip the unit over and you can then affix the bottom to the unit. Becareful to allign the side marks to insure that the machines will
fit within the designated areas.
|
|
|
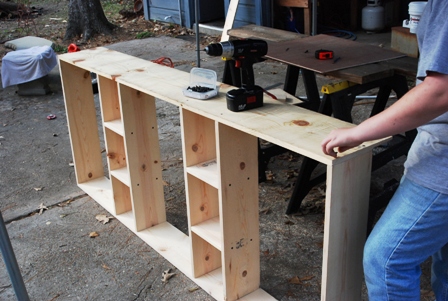
When you are done building, test fit a machine in all three spots. Then prime and paint (or stain). To affix to the wall, use large
angle brackets secured to studs and leveled. Set the unit on the brackets. Then using "L" brackets you can affix the top of the machine
the same studs inside the machine area and out of sight. Pachinko machines full of balls can weight upwards of 45 to 50lbs and you will
want to use strong brackets to support this 150lb plus weight!
|